|
Michael McFadyen's Scuba Diving - Hanakawa Maru
The Hanakawa Maru was launched on 31 August 1943 from the Kawasaki Dockyard for Kawasaki Kisen. She was a freighter of 4,793 tons gross, 112 metres long and 15.8 metres wide. Powered by a 2,000 hp coal powered steam turbine engine. This gave the ship a cruise speed of 10 knots and a maximum speed of 15 knots. The ship entered service on 25 October 1943 but really never entered the service that it was intended for, being taken over by the Imperial Japanese Navy on 25 December 1943.
On 18 February 1944 the Hanakawa Maru was anchored south east of Tol Island in Chuuk Lagoon. At 0630 hours, planes from the USS Bunker Hill and USS Monterey came over the North East Pass of the Chuuk Lagoon outside reef and did a big circle till they approached Tol Island from the south. Tol Island is located south west of the main islands of the lagoon. The torpedo bombers came in low and the first one dropped a torpedo. This hit the Hanakawa Maru amidships. The other three torpedoes from the planes attacking in the same pack either hit the ship (two) or the fuel dock on the island. The first torpedo caused the Hanakawa to explode, with flame and black smoke errupting over 100 metres into the air from the ship.
 |  |
| The Hanakawa Maru | A growth covered light cover on the Hanakawa
Photo by Kelly McFadyen |
The Hanakawa Maru sank almost immediately, within four minutes there was only an oil slick showing. The ship exploded so badly as it was apparently carrying aviation fuel (more about this later) and this was what caused the huge explosion. It is interesting to note that the American pilots thought that this ship was an oil tanker, although it does not resemble an oil tanker in any way.
Today the wreck of the Hanakawa Maru lies on a sloping bottom that goes from about 24 to 34 metres. It is located about 2 kilometres metres from the south eastern point of Tol Island. Tol Island is located a very long way from Moen Island (the main island) and it takes about one hour to get there from Blue Lagoon Resort. It is the most remote of all the shipwrecks in Chuuk Lagoon apart from IJN Oite.
A GPS Reading of N7° 20' 04.1" E151° 38' 38.2" using WGS84 as the datum will put you on the forward mast which is between Holds 1 and 2. This is normally where the dive boats anchor as it is the shallowest part of the wreck and they can see if from the surface. It is only 6 metres or so down.
 | 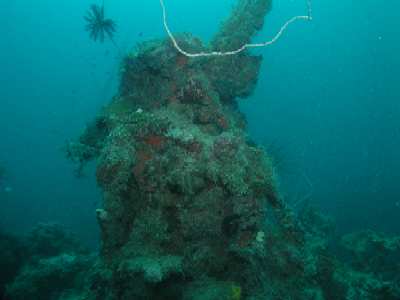 |
A lantern on the Hanakawa
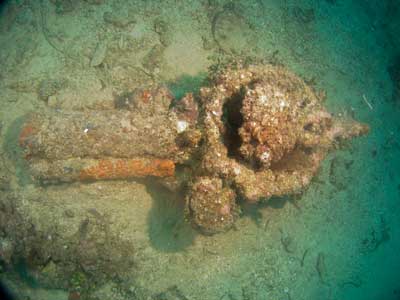
Photo by Kelly McFadyen | The stern gun of the Hanakawa
Photo by Kelly McFadyen |
Despite the huge explosion that sank the ship, it is very intact. As mentioned, dive boats normally anchor on the forward mast which is about six metres deep.
The stern is a little deeper than the bow so it is probably better to head there first. From the mast head to the top of the bridge. You will see that there is a small hold aft of the bridge. This is located before the engine room and the remains of the funnel. The hold is probably the coal bunker. It seems to have had a major fire and there are some drums in here as well. I think it gives access to the engine room.
 | 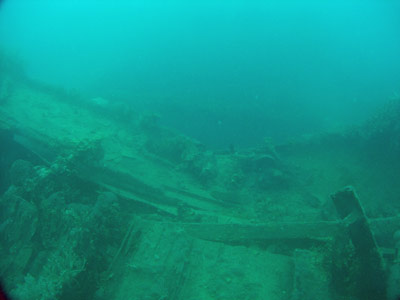 |
| Looking out from inside the engine room through the skylights | This is the collapsed rear section of the superstructure |
Above the engine room and behind the collapsed funnel there are the engine room skylights.The starboard side skylights are open and you can more easily enter the engine room via these. It seems quite interesting to explore. There are lots of catwalks and ladders and apparently it gets to about 27 metres. However, when I dived it, the visibility dropped off dramatically (had someone been here earlier in the day or the day before) about five metres into the engine room. I decided to err on the safe side and exit there.
Behind the skylights is the rear section of the superstructure. This has collapsed in the middle. More about this on the way back from the stern. Hold 4 is straight behind the superstructure. There are hundreds of aviation fuel drums (200 litres) in here. As mentioned above, the ship was carrying aviation fuel and for many years till the late 1990s or early 2000s, the ship was rarely visited as there was fuel leaking from the drums and this was burning the skin of divers. However, this problem now appears to have almost totally disappeared, presumably since the fuel has totally leaked out of the drums.
 |  |
| A large coil of rope inside the poop deck of the Hanakawa Maru | The fallen stern telegraph |
Between Holds 4 and 5 there is another mast and some winches. Hold 5 has even more drums of aviation fuel. The bottom of the holds are about 27 to 28 metres. The deck here is about 25 metres.
The stern has a large platform and a 12 cm Navy Short Gun mounted on it. It points up at 45°. This is a very small but fat gun, unlike anything normally seen on an armed freighter. There is also a ship's telegraph which has fallen over. This area is about 22 metres deep.
You can enter the poop deck via doors on either side of the ship. There are lots of bottles, in here as well as many large coils of rope. Under the stern the large four bladed prop can be seen. It is almost 30 metres here.
 |  |
A lantern on the Hanakawa
Photo by Kelly McFadyen | The stern gun of the Hanakawa
Photo by Kelly McFadyen |
Swim back along the deck, this time on the opposite side to that you came down on. The ship is covered in the most magnificent marine life. There are soft and hard corals, sea whips and gorgonias as well as anemones. This wreck is almost as alive as the Shinkoku Maru which is the nearest wreck in the lagoon (although well over 10 kilometres away).
As mentioned, the rear superstructure has collapsed. You can look in the doors on the starboard (and I presume port) sides, but it is too hard to enter. The bridge has also collapsed and it cannot be entered. This is about 15 metres deep on the top.
Continue forward to Hold 2 in front of the bridge. As soon as you drop inside you will see that there is a very large hole in the hull on the starboard side. This is where the first torpedo hit. You can easily swim out the wreck via this hole. There are more drums in here. Hold Two had the fuel drums that exploded and as such, there are not too many there now. There also appears to be lots of bags of cement at the bottom and perhaps even one torpedo.
From Hold 2 you can see through into Hold 1. You can swim straight through rather than exiting back up to the deck. There are lots of drums in this hold as well. This hold is 27 metres deep. At the bow there is an anchor chain running out across the sand. Behind the large forecastle and on the sand are numerous drums. These appear to have been thrown overboard when the ship was hit by the torpedo and when it sank. The forecastle can be entered and via teither door and you can exit the other one. There is a small room in here as well. The bow is about 17 metres deep.
 | 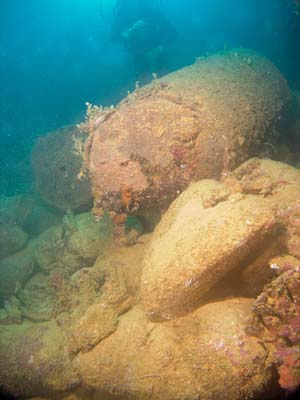 |
| Some of the drums in Hold 2 as well as the torpedo hole | Another shot of inside Hold 2, notice
the cement bags and the torpedo |
By now it will be time to ascend as you will most certainly be low on air and already in decompression. Ascend up the forward mast. There is a lot of nice marine life to look at.
This is a nice wreck and it is worth the long boat drive to get to it if you are in Chuuk for more than 10 or so days.
Dives:
27 October 2011
References:
Hailstorm over Truk Lagoon by Klaus Lindemann
WII Wrecks of the Kwajalein and Truk Lagoon by Dan E. Bailey
26 Principal Shipwrecks of Truk Lagoon by Capt. Lance Higgs
| 
 v6.00.307 © 2003-2005