|
Michael McFadyen's Scuba Diving - Shotan Maru
The Shotan Maru is an oldish looking ship, the exact details of builder and owner which I have not yet been able to find out but Dan Bailey in his book WWII Wrecks... (see references) claims it was built in 1942 as one of 14 Standard Type 1D ship. In that book, he gives the name as the Matsutan Maru with alternate names of Matsutani Maru and Shotan Maru. I will use the most commonly used name, Shotan Maru. Whatever is correct, the ship was not real big, 1,999 tons, 87 metres long and 12.8 metres wide. Powered by a coal burning vertical triple expansion steam engine, it was capable of 12.5 knots.
As stated above, the look of the ship and its engine do not really match up with the build date of 1942. I have yet to find more about this ship and even with more research, I have yet to be successful. There is no record of the ship under any of the above three names in Lloyds Register or Warships of the Imperial Japanese Navy, 1869 - 1945 by Hansgeorg Jentschura et al.
 |
| The Shotan Maru |
On 17 February 1944, the Shotan Maru was in Chuuk Lagoon but I have no information about the original anchoring point of the ship (see next two paragraphs). From Bailey's book, it is possible that the Shotan Maru was attacked by planes from USS Enterprise during Strike 1AE on the first day of the attack. Heavy damage was reported from the hit amidships (this tallies with the wreck- see later). It is possible that she was also seen aground on a reef east of Dublon Island (maybe the small island mentioned in the next paragraph?). This ship was hit by torpedo bombers from USS Essex at 0820 hours (there is no obvious damage from a direct torpedo hit). Nevertheless, it is assumed that the ship sank during Operation Hailstone.
Nowadays the Shotan Maru rests to the east of Eten Island, very close to the San Francisco Maru. A GPS Reading of N7° 21' 43.8" E151° 55' 4.7" using WGS84 as the datum will put you on the bridge. Verbal reports given to me back in 1997 by Blue Lagoon Dive Shop dive guides (Meckency and Randy) state that captain of the ship was trying to run his vessel up on nearby Fanamu (Jeep) Island. It is aimed right at the island and is not too far off, so I guess they might be correct.
 |  |
| The forward deck of the Shotan Maru | Damage near the rear holds of Shotan Maru |
She lies in a valley with the bow pointing to a small hill and the stern lower than another large sand hill which is primarily on the starboard side. The bottom of the valley near the wreck is 50 metres and the bow is about 40 metres. The bridge is 37 metres and the bottom of the holds about 47 to 49 metres. The wreck is upright with a slight list to port. It was found in 1980.
This is another ship that does not get regularly dived, for reasons I cannot understand. The dive boats anchor in the bridge area. From the bridge, you can easily swim straight to the bow where you can see that there is no gun. As both anchors are up, it does not appear that the ship was anchored when she was hit, so the claims that the skipper was trying to ground her may be correct.
The forecastle is accessible through either of the two doors but there is not much to see, only some paint cans.
 |  |
| The rear axle of one of the trucks that has fallen into Hold 1 | Another of the trucks that is on Hold 1 |
Behind here is Hold 1. This hold does not have any 'tween deck and there used to be two trucks on the hold beams, facing the port side. These trucks have small cranes behind the cabins and they have twin rear wheels. In 1997 one of the sets of wheels had fallen off one truck and lay down in the hold. However, in 2011 both of the trucks had fallen down and only the cranes remained on the hold beams. One engine faces port and the other starboard.
There is another truck on the sand on the port side. Hold 1 also has two sorts of shells, some packed in fours (small timber boxes covering warheads), others packed in larger packs. There are also grenades and bottles (in timber crates) in the hold. Holds 1 and 2 are not really totally separated and you can swim right through from one to the other. In between the two holds there are large numbers of piles (for wharves?) and timber planks. There are also coils of rope.
 |  |
There are a number of rolls of this matting in
holds of ships in Chuuk - this is in Hold 1 | Some of the many bottles in Hold 1 of Shotan Maru |
Hold 2 has more items of interest. There is more timber on the starboard side and at the rear of this hold. This hold has dozens of bags of cement (starboard and rear), beer bottles, some 200 litre drums, some other items (mess kits?). On the bottom of the hold and towards the starboard rear of the centre section is a large diesel engine. Also in this hold there is also another very large object. This is located on the port side of the centre of the hold and is a very large compressor on wheels. It has a large air tank at the forward end.
 |  |
| Artillery shells in Hold 1 of Shotan Maru | A photo of Hold 2 |
From Hold 2 you can exit back out the hatch and then enter the bridge via one of the doors. The bridge has now collapsed a fair bit. The lower level doors access areas that are quite cluttered with wires and other things, especially as the upper level has collapsed, and should be avoided.
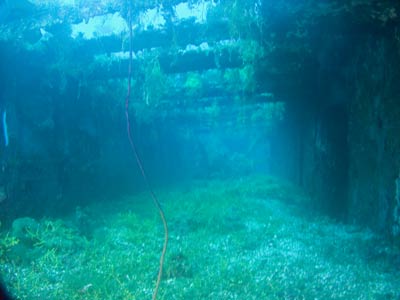
On the upper level, you used to be able to use the starboard door and swim along the passageway and you where there was a door on the right. However, as mentioned the upper level of the bridge has now collapsed. If you swimover the top of the bridge you can see the helm collapsed on the floor beams.
 |  |
| The large diesel engine in Hold 2 | The wheeled compressor in Hold 2 |
 |  |
| Some of the hundreds of bags of cement in Hold 2 | A lifeboat davit on the starboard side |
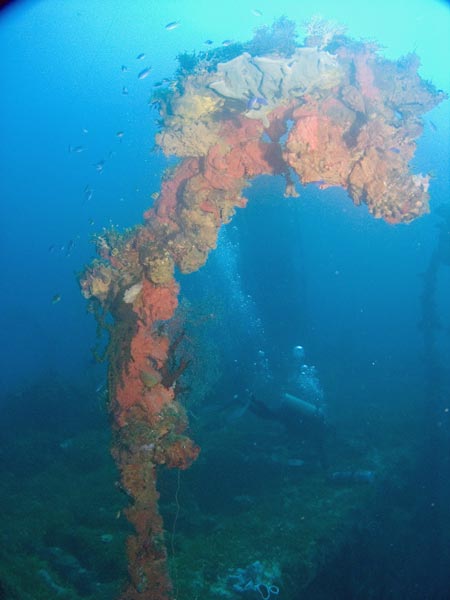
The funnel and ventilators are intact and the funnel reaches quite high, up to about 33 metres. Once behind the front part of the bridge, you can access the engine area. As I did this in 1997 and the bridge has collapsed, I am not certain now of how this can be accessed. I think that this was via the lower level of the bridge. I am not sure now if you can get to this level now. Anyway, if you can, on the starboard side there is a door that leads into the engine room. The engine room is quite dark as the skylights are closed and the glass covered with growth. It is not very large and only a couple of people can enter at any one time. After looking at the engine, exit out the same door and continue towards the stern. You then go out another door which comes out over Hold 3.
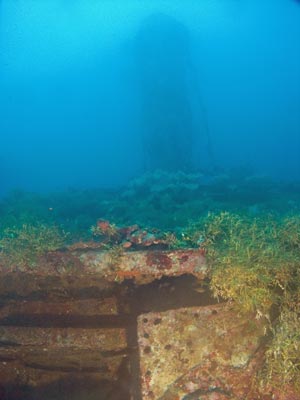 |  |
This shows the collapsed upper level of the bridge
with the funnel in the background | The starboard passageway on top level of the bridge
- access door to right |
In 2011 I did not see this door, so as mentioned I suspect that it is the level down from the now accessible top level. Near the funnel there is a door that opens to a corridor that crosses over from the starboard side to the port side. Just inside the door there is a set of stairs on the left that seems to give access to the engine room. However, it was too narrow to use with twin tanks. Once you are on the port side there is a second corridor that runs forward and aft. You can go to the left and this will take you out the rear of the bridge. There are a number of cabins along this second corridor and on the left just before exiting, there is a door. This is the galley. You can go through this and exit the other side if you want to. In 2011 I found a tank and regulators that a guide had lost about six days earlier here.
 | 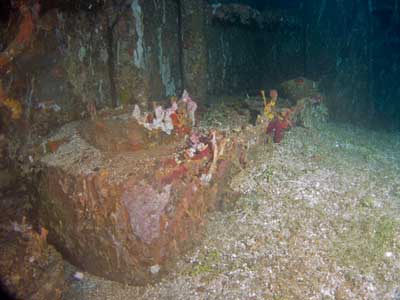 |
| The corridor that goes from starboard to port | The galley of the Shotan Maru |
Hold 3 is almost empty except for a few 200 litre drums and the beams of the hatch cover.
Hold 4 (which is empty) appears to have been hit by a bomb on the starboard side towards the rear of the hold. The whole deck around the hold has collapsed. There is also damage on the port side. There is a hole about two metres across and it looks as though a bomb has exploded on the outside. The damage is certainly not consistent with torpedo damage on other ships in Chuuk. The whole hull has cracked in this area. It is possible that this damage was caused by the torpedo mentioned earlier exploding while the ship was aground. Perhaps the torpedo hit the reef and exploded a bit away from the ship.
Out of the hold, the deck has collapsed two or three metres behind the hatch. The rear mast has fallen over the starboard side of the wreck. On this side there is a sand mountain encroaching on the wreck. It is far higher than the wreck and is already starting to come over the main deck, although this can change at times. The mountain also lies behind the wreck. The prop is buried in the sand. There is a gun platform and gun on the stern. The barrel faces the rear port quarter. There is also a helm and the remains of a steering wheel here.
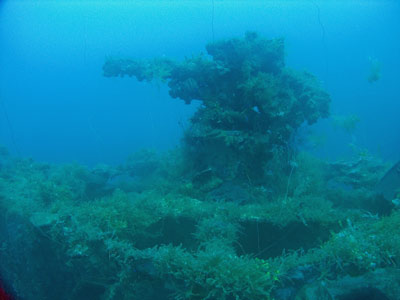 |  |
| The stern gun of the Shotan Maru | The stern helm of the Shotan Maru |
This is about all the time you will have at the main part of the ship. Returning to the bridge area you can see the funnel intact but there is some damage behind it. The fly bridge was made of timber and it has now totally rotted away. The timber floor of the bridge is gone and as mentioned this level has now collapsed downwards. The helm has fallen over and can be seen. There is no telegraph to be found. If visibility is good, you can ascend up the funnel to about 33 metres and then cross over to the anchor line.
 | 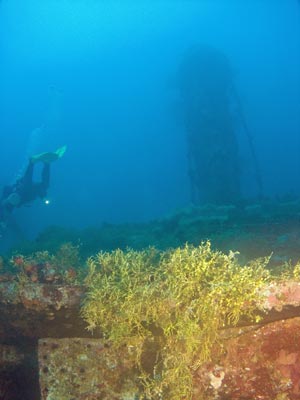 |
| Nancy Scoleri and the funnel | The funnel of the Shotan Maru |
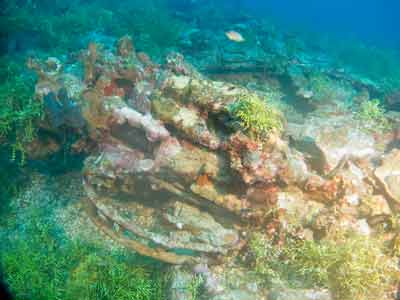 |  |
| The fallen bridge helm | Looking back at the funnel as I ascend |
This is another excellent wreck, well worth diving. On my dives here I did a bottom time of between 19 and 22 minutes which meant doing a decompression of 1 minute at 9 metres, 5 minutes at 6 metres and 12 minutes at 3 metres. The visibility here was excellent, in excess of 30 metres (40, 40 and 50 on my three dives), similar to all the wrecks in this part of Chuuk Lagoon.
Dives:
18 November 1997
22 October 2011
28 October 2011
References:
Hailstorm over Truk Lagoon by Klaus Lindemann
WII Wrecks of the Kwajalein and Truk Lagoon by Dan E. Bailey
26 Principal Shipwrecks of Truk Lagoon by Capt. Lance Higgs
| 
 v6.00.307 © 2003-2005