|
Michael McFadyen's Scuba Diving - USAT Liberty, Indonesia
In September 2012 Kelly and I did a week long liveaboard dive trip in Indonesia which went from Bali to Komodo and back. We went on the MV Mermaid II. Click here to read about the boat.
The following week we travelled to Tulamben where were spent another week diving the north-eastern coast of Bali. We used Tulamben Wreck Divers. Click here to read about the town and dive operation. This is one of the dive sites we did during the second week. There are literally hundreds of dive sites located within a few kilometres of Tulamben.
The most famous of the dive sites is the wreck of the USAT Liberty. Click here to read about the history of the ship. An approximate GPS mark for the dive site entry is 8º 16' 30.8"S 115º 35' 34.1"E (using WGS84 as the datum) and the wreck is located more at 8º 16' 28.8"S 115º 35' 34.1"E.
 |
A satellite photo from Google Earth that shows the location of the dive site - you enter from the shore
straight opposite the boat - the wreck is about the distance the boat is off shore but north of the small white building behind beach |
As with virtually all dive sites that you do here, you gear up at the dive shop and then walk to the actual site. Meanwhile, your dive gear is transported by porters (on their head or on a scooter). From the Tulamben Wreck Divers shop you walk across the road and down the access road that leads to the car park for diving the wreck. A short walk down a track from the car park takes you to the beach where the wreck dive starts.
The wreck is located about 45º to the left of where you enter the water. The beach is composed of small and large rounded rocks. This makes it a little difficult to enter the water and great care needs to be taken to ensure that you do not twist an ankle. Once in the water you put on your fins and only swim out about five metres before descending.
 |
A diagram of the wreck - note it has collapsed a fair bit more than shown here
Used courtesy of Tulamben Wreck Divers |
The depth straight away is about four or so metres and within a few seconds you have left the rocks behind. The bottom here is black sand. There are a number of ridges that run at right angles to the beach and in between there are gullies. All of this is black sand. If you head off towards your left and gradually get deeper to about 15 metres, you will soon come across the wreck.
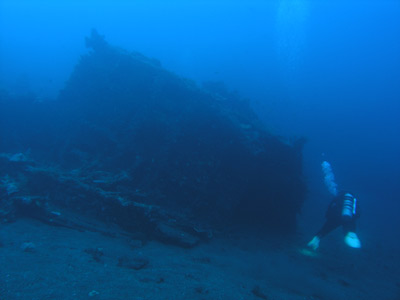
The wreck lies parallel to the shore, with the stern facing to the south-east. This is the section you will find first. The wreck is on its starboard side and the depth on the top here is perhaps eight metres.
 |  |
| The prop used to be here before it was salvaged | Looking back at the wreck from deeper |
 |  |
A barrel sponge off the forward part of the wreck
with a mast or boom hanging down on the bottom | A diver in one of the holds |
The rudder is still in place but the propeller is not. It was obviously salvaged at some time and you cannot even see the prop shaft as it also appears to have been removed. If you follow the wreck deeper from the prop area you will come to the rear superstructure which has collapsed down to the sand. At the rear of this is the large stern gun. This is lying over with the barrel pointing back at the prop. In 2012 there was a very cute white, red and yellow clown anglerfish here. It was about 25 mm long.
 |  |
| I think this is the bridge area | The mid section of the wreck |
 |  |
| Kelly and the barrel of the bow gun | Looking up at the bow gun from below |
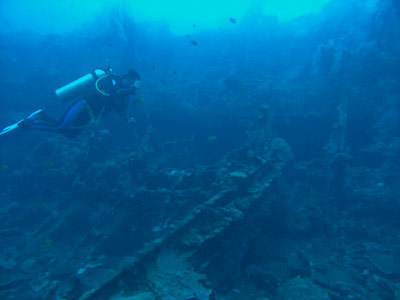
Swimming forward from here you will be at about 22 metres and gradually get a bit deeper to about 26 metres (if you stay right next to the wreck). There are more collapsed sections and quite a few masts and booms hanging from the wreck onto the sand.
This is a relatively large wreck, 125 metres long (25% longer than a football field), so it takes a few dives to cover it all to give you a good understanding of it. However, even on one dive you should be able to swim the whole length of the wreck unless you are an airpig.
If you are only here for the day, then make sure you go all the way to the bow if you can. If you do a few dives here, then you can easily just concentrate on sections. Anyway, back to the dive. As you move along you will see lots of gorgonias, barrel sponges and coral. The wreck is covered in gorgonias and corals, but there are also lots off on the sand. It is worthwhile going out a bit deeper to get a view back of the wreck.
 |  |
| Kelly and a huge gorgonia under the bow gun | The anchor chain |
 |  |
| The main part of the wreck | One of the engine room catwalks |
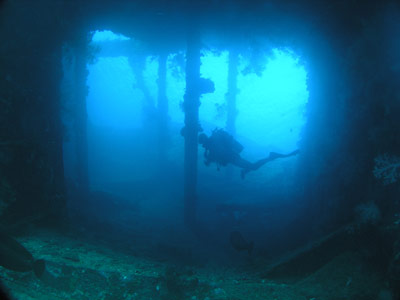
About half way along the wreck you will come the the collapsed superstructure. This used to be the bridge and accommodation areas as well as where the engine-room is located. There are also a couple of gun platforms here and a spare anchor. For now, leave these and continue to the bow.
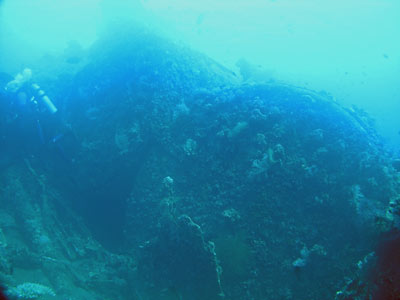
The ship's back is broken here, behind the second hold. You will see more masts on the sand and then the bow. This is very prominent and the most attractive part of the wreck. There is a huge bow gun here, with the barrel facing forward. There are some enormous gorgonias on and under the gun mount.
On later dives, head out deeper off the bow to about 30 or 32 metres. Here you will find one of the anchor chains. It snakes around from the bow, under the hull and out deeper before running back to the north-west.
 |  |
| Two of the boilers | Kelly on a section of the wreck |
After you round the bow, swim back along the hull and then into the hold. You can see that the torpedo must have hit the ship here as the hull is bent inwards at this location. There is a huge amount of damage and the keel is broken here as well.
The port side of the hull has collapsed and it is very open. Come back at about 18 metres or so and you will have some swim-throughs and more large gorgonias. You can get some great photos in this area as well.
Back near the rear of the second hold there are some gorgonias. These have tiny pygmy sea horses on them. Your guide will be sure to show them to you. In this area you can see the catwalks from the engine room and three boilers which are still in the main section of the wreck. However, as far as I can see there is no engine that is visible, although I think I saw the fly-wheel.
Come back through the wreck and you will end up back at the stern near the prop (remains). Once you have only 70 bar or so, start your ascent back across the sand and spend as much time as you can on the five metre level doing a safety stop. You can easily get into decompression if you are not careful (or if you plan it), so keep aware. There is plenty to see at five metres, lots of small critters on the black sand. Exit back where you entered.
 | 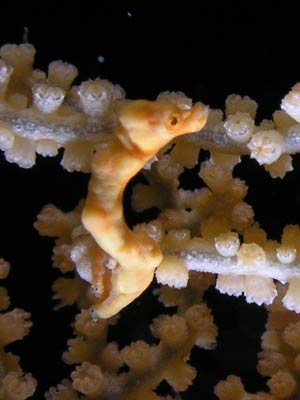 |
| A tiny pygmy sea horse | Another tiny pygmy sea horse |
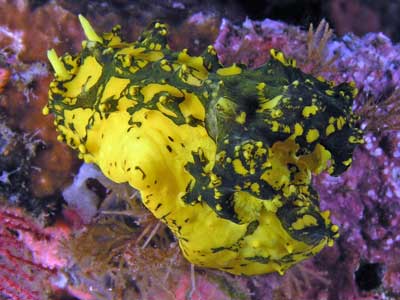 |  |
| Gardners notodoris | Robust ghost pipefish |
 |  |
| Humpheaded wrasse under the stern | Soft coral crab |
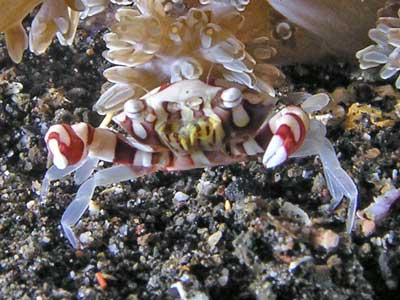 | 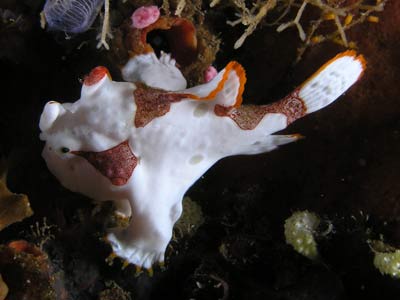 |
| A very nice crab, tiny | Tiny clown anglerfish on the stern gun |
This is brilliant dive site, not so much for the shipwreck itself, but for the fishlife that lives in and around the wreck. There are up to a few dozen huge hump-headed wrasses that live on the wreck, although you need to be diving here very early or late to see them (See next paragraph why). There are also lots of pygmy sea horses, mantis shrimps, nudibranchs of many species, anglerfish and more.
You can dive here many times on a trip (we did it once a day) and still see new things. If you are staying at Tulamben, it is recommended that you dive the wreck very early in the morning (before 8 am) as the day-trippers from Kuta arrive after this and there can be well over a 100 divers here at one time.
The visibility was probably 20 to 25 metres and the water temperature was about 27ºC.
Click here to return to the list of sites we did at Tulamben. | 
 v6.00.307 © 2003-2005