|
Michael McFadyen's Scuba Diving - SMS Markgraf
SMS Markgraf was the third battleship of the four-ship Konig class to be ordered. The keel was laid down in November 1911 (at the same times as sistership SMS Kronprinz). The new battleship was launched on 4 June 1913 from the AG Weser, Dockyard in Bremen, Germany (a different yard to the Kronprinz).
The ship was named in honour of the royal family of Baden. The name Markgraf is a rank of German nobility and is equivalent to the English Marcher Lord, or Marquess. The new warship was 175.4 metres long (I have also seen 154 and 146 metres as the length - I think the longer one is correct when you compare the plans below) with a beam of 29.5 metres. She drew 9.19 metres and displaced 29,699 tons full load. She was powered by 3 Bergmann steam turbines driving three props. The turbines had a combined 43,300 shp. The steam came from 3 oil-fired and 12 coal-fired boilers. She carried 600 tons of oil and 3,000 tons of coal. She had a maximum speed of 21 knots with a range of 8,000 nautical miles. She was manned by 41 officers and 1,095 enlisted men.
The Markgraf was originally ordered as the Ersatz Weissenburg. She was commissioned into the Imperial Navy on 1 October 1914, only five weeks before the Kronprinz was commissioned on 8 November 1914 (the Kronprinz's construction was sped up after the war started). The cost of the vessel was 45 million Goldmarks. The ship was christened by Frederick II, Grand Duke of Baden, the head of the royal family of Baden, in honour of which the ship had been named.
The Markgraf was armed with 10 x 12 inch SK L/50 guns arranged in five twin gun turrets. There were two superfiring (firing over the turret in front or behind) turrets each fore and aft and one turret amidships between the two funnels. Other armament consisted of 14 x 5.9 inch SK L/45 quick-firing guns, 10 x 3.5 inch SK L/45 quick-firing guns and five 20 inch underwater torpedo tubes, one in the bow and two on each beam.
 |
| SMS Markgraf |
SMS Markgraf completed her sea trials on 1 December 1914. By 10 January 1915, the ship had joined III Battle Squadron of the High Seas Fleet with her three sister ships. She was under the command of Captain Hermann Nordman.
The Markgraf's first action with the fleet was to Terschelling on 29 and 30 March 1915. The German fleet did not engage any British warships during the sortie. More uneventful operations followed on 17 and 18 April 1915 and 21 and 22 April 1915. From August 1915 her new captain was Charles Soap Ring (fair dinkum, this is what the Scapa Flow Wrecks site says his name was). On 11 and 12 September 1915 Markgraf and the rest of III Squadron supported a minelaying operation off Texel. Another uneventful sortie on 23 and 24 October 1915 followed, this time probably under Captain Frederick Behncke.
Like her sisterships (and in fact most of the German navy), the Markgraf did little and saw no action for all of 1915 and well into 1916. On 5 to 7 March 1916 there was an uneventful sweep of the Hoofden (a part of the English Channel/North Sea between England and the Netherlands). More sorties followed on 26 March 1916 and 21 and 22 April 1916.
On 24 April 1916 Markgraf and Kronprinz supported a raid on the English coast conducted by the German battlecruiser force of the I Scouting Group. They left the Jade Estuary and on the way the battlecruiser Seydlitz struck a mine and had to withdraw. The other battlecruisers bombarded the town of Lowestoft (east of Norwich) unopposed, but during the approach to Yarmouth, they encountered British cruisers. A short gun duel ensued before the British ships withdrew.
Markgraf was present during the Battle of Jutland which took place on 31 May and 1 June 1916. This was the only real naval battle of the war. The German fleet sought to draw out and isolate a portion of the British Grand Fleet and destroy it before the main British fleet could retaliate.
She followed her sisterships Konig, Grosser Kurforst with Kronprinz bringing up the rear. Shortly before 4:00 pm, the battlecruisers of I Scouting Group encountered the British 1st Battlecruiser Squadron under the command of David Beatty. The opposing ships began an artillery duel that saw the destruction of HMS Indefatigable, and HMS Queen Mary within 90 minutes.
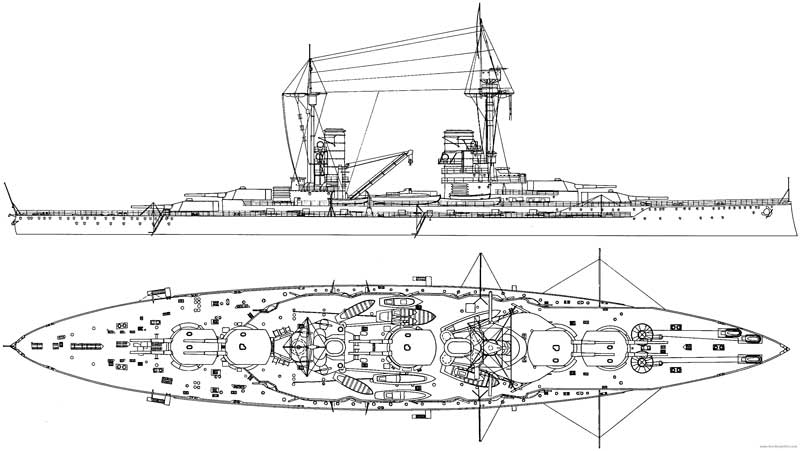 |
| The plans of SMS Konig, identical sistership to SMS Markgraf |
At 5:46 pm on 31 May 1916, the order to open fire was given to the battleships (which were not involved in the above initial action). Markgraf opened fire on the battlecruiser HMS Tiger at a range of 21,000 yards. She continued to engage Tiger until 6:25 pm. At 6:10 pm one of the British ships scored a 15 inch shell hit on Markgraf. Shortly after, the destroyer HMS Moresby fired a single torpedo at Markgraf but it missed. HMS Malaya fired a torpedo at Markgraf at 7:05 pm but due to the long range it also missed.
Around this time Markgraf engaged a cruiser before shifting her fire back to the 5th Battle Squadron for ten minutes. Two more 15 inch shells hit Markgraf. The first hit struck on a joint between two 8-inch-thick side armour plates, punching a hole in it. The main deck was buckled and approximately 400 tonnes of water entered the ship. The other two shells failed to explode.
Shortly after 7:00 pm during a German attempt to save SMS Wiesbaden, the British III and IV Light Cruiser Squadrons began a torpedo attack on the German line. Markgraf and her sisterships fired at the British cruisers but this failed to drive them off. Markgraf fired both her 30.5 cm and 15 cm guns at the cruiser HMS Defence. The British ship exploded and sank. Credit was given to the battlecruiser SMS Lotzow for the sinking, though the Markgraf also claimed credit for the sinking.
Markgraf then fired on the battlecruiser HMS Princess Royal and scored two hits. The Markgraf was also firing on the cruiser HMS Warrior at the same time. She was seriously damaged by 15 heavy shells and forced to withdraw. Warrior foundered on the trip back to port the following morning.
Around 7:30 pm HMS Orion began firing at Markgraf. The last of her four salvos of 13.5 inch shells scored a hit. The shell exploded on the armour protecting the No 6 15 cm gun casemate. The explosion seriously injured two and killed the rest of the gun crew. Another heavy shell nearly struck the ship at the same time. At 7:44 pm a bent propeller shaft forced Markgraf's crew to turn off the port engine, perhaps as a result of the last shell to hit. Her speed dropped to 17 or 18 knots.
Just after 8:00 pm Markgraf was engaged by HMS Agincourt's 12-inch guns which scored a single hit. Luckily the shell failed to explode. The heavy fire of the British fleet forced the German fleet to turn away. As they departed, several British light cruisers and destroyers stumbled into the German line around 9:20 pm. During a short engagement, Markgraf hit the cruiser HMS Calliope five times with her secondary guns.
Around 2:45 am the next morning, several British destroyers mounted a torpedo attack against the rear half of the German line. Heavy fire from the German battleships forced the British destroyers to withdraw. At 5:06 am Markgraf and several other battleships fired at what they thought was a submarine.
 | 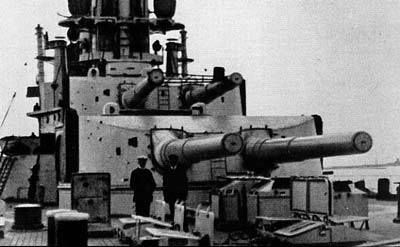 |
| SMS Markgraf | The forward guns of the SMS Konig, identical to SMS Markgraf |
The High Seas Fleet managed to punch through the British light forces without drawing the attention of the British battleships. Upon reaching Wilhelmshaven, Markgraf went into harbour while several other battleships took up defensive positions. She was then moved to Hamburg where she was repaired in AG Vulcan's large floating dock. Repair work was completed by 20 July 1916. In the course of the battle, Markgraf had fired a total of 254 shells from her main battery and 214 rounds from her 15 cm guns. She was hit by five large calibre shells, which killed 11 men and wounded 13.
The Battle of Jutland was over, with the Germans probably considered the winners.
Following the repairs, Markgraf went into the Baltic for trials and was then temporarily assigned to the I Scouting Group for the fleet operation to bombard Sunderland on 18 and 19 August 1916. Due to the serious damage to Seydlitz and Derfflinger at Jutland, the only battlecruisers available were Von der Tann and Moltke which were joined by Markgraf, Grosser Kurforst and the new battleship Bayern. The British were aware of the German plan and sortied the Grand Fleet to meet them. By 2:35 pm the German commander had been warned of the Grand Fleet's approach. He was not keen to fight the whole of the Grand Fleet less than three months after Jutland, so the German fleet retreated.
Markgraf was present for the uneventful advance in the direction of Sunderland during 18 to 20 October 1916. Training with the III Squadron followed from 21 October 1916 to 2 November 1916. After this she formally rejoined III Squadron. Markgraf was sent (as a part of a larger group) to cover the recovery of a pair of U-boats that were stranded on the Danish coast. On 5 November 1916 when returning, both Grosser Kurforst and Kronprinz were torpedoed by the British submarine J1 near Horns Reef. Both ships reached port.
For most of 1917 Markgraf was stationed on guard duties in the North Sea, interrupted only by a refit period in January and periodic unit training in the Baltic. In August 1917 Captain Hermann Berger Morse took over command.
In early September 1917, following the German conquest of the Russian port of Riga, the German navy decided to eliminate the Russian naval forces that still held the Gulf of Riga. The Navy High Command planned an operation to seize the Baltic island of Osel, and specifically the Russian gun batteries on the Sworbe Peninsula. The Markgraf was part of a naval fleet that included the other Konig-class ships. The entire force numbered some 300 ships, supported by over 100 aircraft and six zeppelins. There were approximately 24,600 officers and enlisted men in the land-based group.
The attack began on 12 October 1917 when at 3:00 am the Konig anchored off Osel in Tagga Bay and disembarked soldiers. Around 5:50 am the Konig opened fire on Russian coastal artillery emplacements and was soon joined by the Moltke, Bayern and the other three Konig-class ships, including the Markgraf . Markgraf fired on the battery located on Cape Ninnast. While after the successful assault the III Squadron steamed to Putziger Wiek, the Markgraf remained behind for several days.
On 17 October 1917 Markgraf left Tagga Bay to rejoin the squadron in the Gulf of Riga but early on 18 October 1917 she ran aground at the entrance to Kalkgrund. The ship was quickly freed and she reached the III Squadron anchorage north of Larina Bank on 19 October 1917. The next day, Markgraf steamed to Moon Sound, and on 25 October 1917 she was part of the bombardment of Russian positions on the island of Kyno. The ship returned to Arensburg on 27 October 1917 and two days later was detached from Operation Albion to return to the North Sea.
While in the Irben Strait Markgraf struck two mines and took in lot of water. The ship continued on to Kiel via Neufahrwasser in Danzig. She then went to Wilhelmshaven where the mine damage was repaired at the Imperial Dockyard from 6 to 23 November 1917. After repairs were completed, Markgraf returned to guard duty in the North Sea.
Most of 1918 was a very quiet time for the Markgraf. She was in dock in Kiel from 15 March 1918 to 5 May 1918 for the installation of a new foremast. That was bas
Markgraf and her three sisters were to have taken part in a final fleet action at the end of October 1918, just days before the Armistice was to take effect. The bulk of the High Seas Fleet was to have sortied from their base in Wilhelmshaven to engage the British Grand Fleet with the idea of inflicting as much damage as possible on the British navy. This was an attempt to get a better bargaining position for Germany in the now certain to come armistice.
Many of the German sailors were sick of the war and felt the operation would disrupt the peace process and prolong the war. On the morning of 29 October 1918 the order was given to sail from Wilhelmshaven the following day. Starting on the night of 29 October 1918, sailors on Thoringen and then on several other battleships, including Kronprinz Wilhelm, mutinied. The unrest ultimately forced the cancellation of the operation.
In November 1918 Lieutenant Commander Walter Schumann became commander, presumably after the war was over. Along with the most modern units of the High Seas Fleet, Markgraf was included in the ships specified for internment by the victorious Allied powers. The ships steamed out of Germany on 21 November 1918 in single file, commanded by Rear Admiral Ludwig von Reuter. They were met at sea by a combined fleet of 370 British, American and French warships. The fleet arrived in the Firth of Forth (Edinburgh) later that day. Then, between 25 and 27 November 1918 they were escorted to Scapa Flow in the Orkney Islands, Scotland. Upon arrival, all wireless equipment was removed from the ships and the breech blocks of their heavy guns were removed to prevent their use. Crews were reduced to minimum levels.
The fleet remained in captivity during the negotiations that ultimately produced the Treaty of Versailles. Reuter believed that the British intended to seize the German ships on 21 June 1919 which was the deadline for Germany to have signed the peace treaty. Unaware that the deadline had been extended to 23 June 1919, Reuter ordered the ships to be sunk at the next opportunity. On the morning of 21 June 1919 the British fleet left Scapa Flow to conduct training manoeuvres, and at 11:20 am Reuter transmitted the order to his ships. Markgraf sank at 4:45 pm. This is the greatest loss of shipping ever recorded in a single day.
As the Markgraf started sinking, two of the crew were shot by British guards trying to stop the scuttling of the ship. The men killed were KK Walter Schumann (Commander) and Oberbootsmannsmaat Hermann Dittmann. They are both buried at the naval cemetery at Lyness which I visited in August 2013.
The majority of the German ships were salvaged in the 1920s and 1930s. A number of companies salvaged some wrecks and then Ernest Cox of Cox & Danks raised the majority of the ships. Later work by Metal Industries Ltd in the 1930s raised more. After all this work, only seven of the 52 ships remained, although there are parts of others which are still on the bottom of Scapa Flow. Later salvage work in the 1960s and 1970s by Nandy (Marine Metals) Ltd and then Scapa Flow Salvage Co Ltd under Dougall Campbell removed materials from the remaining ships.
 |  |
| One of the 5.9 inch guns of SMS Markgraf | One of the doors towards the stern of SMS Markgraf |
The salvage work on the Markgraf included remove the props, a lot of the 12 inch armour plating along the sides of the hull as well as torpedo tubes and engine turbines.
Today the wreck of the Markgraf lies in about 40 to 43 metres on a sandy bottom at GPS N58º 52.959' W3º 08.526' with her bow pointing to the north-west. She is about two kilometres east of the northern point of Cava Island. The wreck is almost totally upside-down, with the starboard side a little higher off the sand than the port side. In 2013 there was a shotline about one quarter of the way back from the bow. This is connected to Markgraf's anchor chain which has looped around the hull when the ship sank. There is also another shotline near the stern, perhaps 25 metres or so from the stern itself on the starboard side. Note that the shotlines have a very light buoy and can easily be pulled under by divers doing decompression stops.
Due to the huge size of this wreck as well as the depth of over 40 metres to the bottom and the best parts), at least two dives need to be done here to even get the slightest understanding of the wreck. For a first dive, I would recommend diving from the forward shotline to the stern and then surfacing from there. You can even return back to the area near the forward shotline and ascend from there. For a second dive you can go from the forward shotline to the bow and then back to the shotline area and then perhaps a bit further back before ascending. I will describe both of these dives below.
Stern
As mentioned, the best dive to do is from the forward shotline to the stern. Once you hit the wreck you will see that the hull bottom is flat and it slopes away a bit to the port side. You will be at about 25 or 25 metres. Also very visible is the anchor chain to which the shotline is attached. When the ship sank the anchor chain had been caught up and ended up wrapped around the hull. Today it runs from the sand up the starboard side to the hull bottom and then across the hull to the port side. This is a very identifiable object.
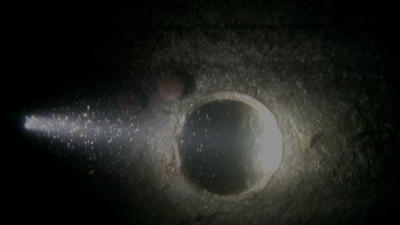 |  |
| A porthole at the stern, it is open and glass is still there | A shot of one of the rudders |
Drop over the hull side and you will reach the sand at 42 metres or so. However, for the moment, stay a bit off the bottom at about 40 metres. I seem to recall that the mooring comes from about half way or so to the bottom from a piece of wreckage. Hopefully your boat operator will advise you exactly where it is when you dive it.
Once at 38 metres, you will see that the wreck has a large overhang that creates a sort of outdoor corridor. This has been created by the removal of the 12 inch armour plating that protected the side of the hull by Campbell in the 1970s. The section of ship that you can now see is actually the inside of the ship and the doors that can be seen in the "hull" are actually doors from the passageway further into the ship. This space was apparently a coal bunker. You can swim along this part of the wreck towards the stern and if you are crazy, enter into the ship.
The main thing to see here are the 5.9 inch guns. There were seven of these guns on each side of the ship, today you can see at least five of them. These are right down near the bottom, so you will have to go to at least 40 metres to see them. At first they are not visible as it is very dark down here and they are right under the side of the wreck. Shine your light in the dark area and you should soon see a gun. Some of the guns are pointing straight forward, but others angle out a little.
Where you reach the bottom should be the most forward gun that is visible. Once you view the first gun, start following the wreck towards the stern along the bottom. You will soon see more guns, there are at least five that I saw on my two dives here. The wreck of course is now on your left. There are bits of wreckage on the sand and hanging off the wreck a bit, and without reasonable visibility it can be hard to figure out what they are. You will see another gun and then the mast is visible on the sand.
After you have gone 50 metres or so, ascend a bit back to 38 metres or so and enter the "passageway". You should see some doors and then a pair of doors very close to each other. These are towards the end of the passageway. Once you see them, have a look inside and you can see (if you have a good torch), some of the interior of the ship. You should have been down about 15 minutes by now.
 |  |
| The propshaft hole | This is where the 14 inch armour plating has been removed |
Head back out and down to the sand again. It will be about 40 metres here as the stern is generally a little shallower than the bow. There are a number of shotlines going up from here, but at least one only goes about 10 metres (I know this as we tried to ascend it - we had seen some of our divers going back up it as we passed by).
When the ship has turned over and hit the bottom, the stern has been squashed a little. Along the sand you can see two rows of portholes. Many of these still have the brass window and glass, although others are empty. The empty ones are mostly bent at 135º. Some may be buried. The stern is just past here, it is a nice curved stern with two huge rudders sticking up vertically. The three prop shafts have not only had the props removed, the shafts are gone as are the A-frame supports for the shafts. It will be about 17 minutes or so. You can either ascend from here (if doing a shorter dive) or keep going.
From here head back towards the bow. The hull will start to rise ahead of you. As well as the prop shaft salvage, you can see where the rear torpedo tubes were salvaged. You can ascend the stern shotline if you can find it. A very viable alternative if you have plenty of air (like we did) is to keep going. You follow the hull as it ascends very gradually back towards the shallowest part which is 26 metres. As you go, you will not gain any more decompression time, in fact you will actually lose time at your deeper stops.
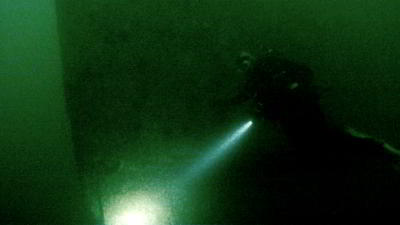 | 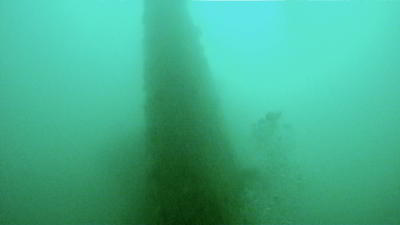 |
| The port side of the bow | Looking up at the bow from straight ahead |
Once you see the anchor chain, you are back at the forward shotline. You can ascend the line (but beware that you will probably pull it under if there is even the lightest of currents) or shoot your own shot. We started our ascent at almost 27 minutes.
 |
| A download from my computer showing our profile for the dive to the stern of SMS Markgraf |
For this dive we used a 26% mix (with deco using 50%) and my OSTC 2N (and Kelly's Shearwater Predator), both gave us deco of 2 minutes at 12 metres, 1 minute at 9 metres and 8 minutes at 6 metres (we had our computers set to do our shallowest stop at 6 metres). The 12 metre stop as well as most of the 9 metre stop disappeared as we ascended the hull and travelled back to the forward shotline.
Bow
If you do a second dive on the Markgraf I would recommend doing the bow. Again, descend the forward shotline. This time follow the anchor chain from the hull bottom over the side. The chain runs at an angle of about 45º towards the bow. Follow it down and just behind it at about 40 metres you will see the first of the 5.9 inch guns. As with the other guns, this is under the wreck in a space about 2 metres high. The gun points forward and one person can swim in and look back at the end of the barrel. Again, you will need a good torch as it is dark here.
From here head forward (with wreck on your right) and you will see some wreckage hanging down off the wreck. This is part of the 8 inch armour that used to protect the forward part of the ship. Some of these sections of plating have slipped down a fair bit.
Soon you will come to the bow. It is about 40 metres or so from the shotline. The depth of the sand here is about 43 metres. The bow is enormous, standing up about 10 metres off the sand. It tilts a little to the left as you look at it from front on. On the sand on the port side there appears to be an anchor partly under the wreck. I am not sure if this is one that was not being used or perhaps the one that she was anchored by when she sank. Go out off the bow, to the front and side on, to get the best perspective of this extremely impressive sight.
From the bow start ascending on the left side of the wreck (as you swim) and you will pass over some salvage work. This is for the forward facing torpedo tube I think. You will come up to about 34 metres and then hit the salvage area for the bow torpedo tubes (these were at right angles to the ship). You can swim from the port side to the starboard side through this salvage area, along a sort of archway or tunnel. Exit back on the starboard side (the side you came along originally).
 | 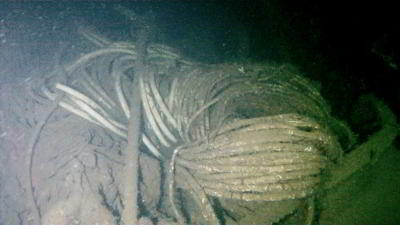 |
| Kelly swimming towards the bow | This is the pile of hose inside the passageway mentioned below |
Just before you come back out onto the side of the wreck, you will see that there is a large passageway that heads back into the ship towards the stern. If you look inside you will see that there is a lot of coiled pipe (or perhaps metal rope) in here. As mentioned, you will come back out on the side of the wreck. Head towards the stern, this time with the wreck on your left. You will soon see the huge anchor chain coming down from above, indicating that you are near the shotline where you started the dive.
This should have taken you about 17 minutes. You should still have a fair bit of air so you can repeat some of what you did on the first dive. Drop back to 40 metres and look at the guns, then go back up to about 35 metres and examine the area behind where the 12 inch armour plate originally was attached. If you did not see them before, you can find a few of the doors that lead inside the wreck and stick your head inside for a look (there is not much to see as it is very dark, even with a good torch).
 |  |
| Kelly and another door | Michael getting back on board Radiant Queen after a dive |
How much air you still have and how much deco you want to do, will determine what you do from here. If you have time, you can swim towards the stern a bit and examine some more before ascending to the shallowest part of the wreck, the hull bottom. Kelly and I went up to the hull bottom from the doors and started our ascent from there (at 26 metres) at about 24 minutes.
This gave us about 1 minute at 9 metres (which disappeared by the time we got to 9 metres) and 8 minutes at 6 metres (using 26% Nitrox and 50% deco mix - shallow deco at 6 metres). Note that we went up the shotline but the slight current meant that it was pulled under to about 4 metres by us holding it. You can easily shoot an SMB to the surface from here (rather than the bottom of the wreck).
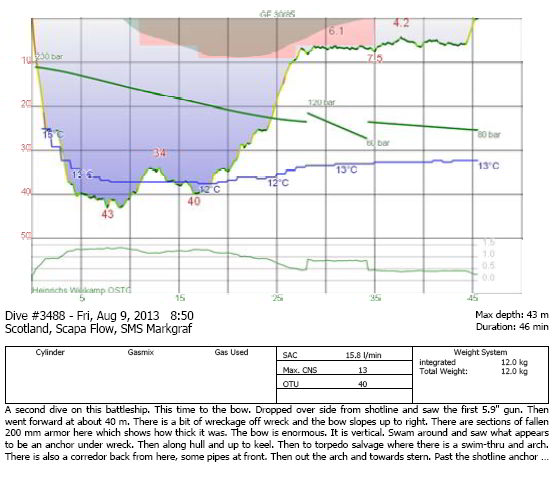 |
| A download from my computer showing our profile for the dive to the bow and midships of SMS Markgraf |
This is a brilliant wreck, probably the best at Scapa Flow. The huge size means that you need many dives to really appreciate it and understand it. If this wreck was anywhere else in the world, you would spend a whole week diving on it. There are normally currents on the wreck, running either from bow to stern or stern to bow. The current when we dived was very light from the bow and this was near the time when tides should have been the strongest for the month. Water temperature was 12ºC when we dived in August. It gets as low as 6ºC in the early part of the season (April) and up to 13ºC in early September. Visibility on both our dives here was 10 metres.
I used a 15 litre tank on each dive, starting with about 230 bar and ending up with about 90 bar at the end. We also used a pony with 50% for all the decompression. We used GFs of 30/85 on our computers.
All underwater photos taken from video using a GoPro camera.
Kelly and I dived with MV Radiant Queen. The owners built a new boat since then which is called MV Huskyan. I would recommend them as we thought the operation was the best overall day charter boat we have used anywhere in the world and the new boat is heaps better than the old one.
Click here to see the list of wrecks
VIDEO
A video taken by Kelly and me and edited by Kelly.
References:
| 
 v6.00.307 © 2003-2005