|
Michael McFadyen's Scuba Diving - SMS Brummer
SMS Brummer was ordered under the contract name C and was laid down at the AG Vulcan shipyard in Stettin in 1915. She was launched on 11 December 1915 and fitting out was completed in less than four months. On 2 April 1916 she was commissioned into the High Seas Fleet.
The new ship was 140.4 metre long and had a beam of 13.2 metres and a draft of 6 metres. She displaced 5,856 tons at full combat load. Her propulsion system consisted of two sets of 33,000 shp steam turbines powered by two coal-fired and four oil-fired Marine-type boilers. These provided a top speed of 28 knots and a range of 5,800 nautical miles at 12 knots. In service however, the ship reached 34 knots.
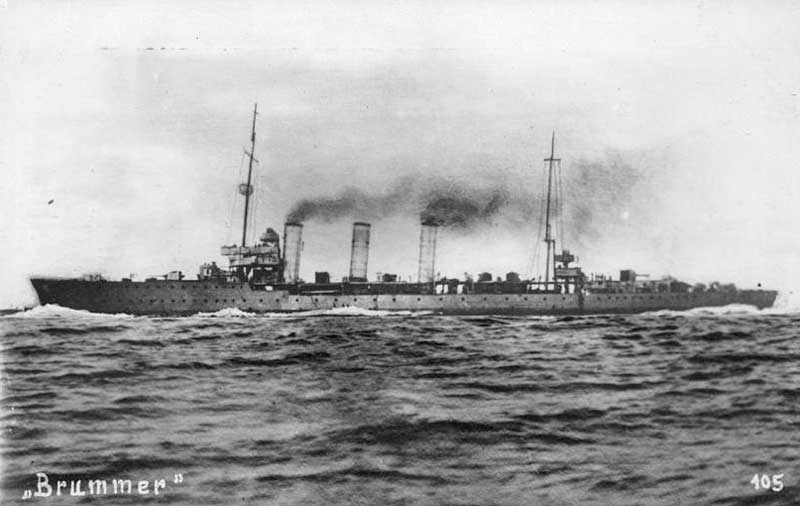 |
| SMS Brummer |
The ship was armed with four x 15 cm SK L/45 guns in single pedestal mounts. Two were arranged side by side forward and two were placed in a superfiring pair aft. These guns fired a 45.3-pound shell with a range of 17,600 metres). Brummer also carried two x 8.8 cm L/45 anti-aircraft guns mounted on the centreline astern of the funnels and a pair of 50 cm torpedo tubes with four torpedoes in a swivel mount amidships. Designed as a minelayer, she carried 400 mines. She was crewed by 16 officers and 293 enlisted men. Despite the fact that they had were built as minelaying cruisers, Brummer and Bremse were never used as minelayers.
Brummer was ready for service with the fleet by May 1916 but she did not take part in the Battle of Jutland which happened on 30 May 1916 and 1 June 1916. She did little for 1916 and early 1917. In autumn of 1917, it was decided that surface warships should work in conjunction with submarines when attacking the British convoys to and from Scandinavia. The aim was to not only damage British shipping but to cause the British to divert naval escorts from protecting convoys across the Atlantic. Brummer (skippered by Fregattenkapiton Leonhardi) and Bremse (Fregattenkapiton Westerkamp) were selected for the first operation. They not only had high speed and a large radius of action, they also bore an uncanny resemblance to British light cruisers. Top make them look more like British ships, their crews painted the ships dark grey.
 |  |
| A diagram of SMS Brummer | SMS Brummer |
Just after dawn on the morning of 17 October 1917, Brummer and Bremse attacked a westbound convoy of twelve freighters. They were escorted by the destroyers HMS Strongbow and HMS Mary Rose and a pair of armed trawlers. The attack started about 70 nautical miles east of Lerwick in the UK.
The German plan to make their ships look like British ships worked. They were able to close to only 2,700 metres before opening fire. Strongbow was quickly sunk and as Mary Rose came into the fight she was also sunk. Unprotected now by any real warships, nine of the British freighters were quickly sunk. The two trawlers and three ships managed to escape. It is said that Kaiser Wilhelm II celebrated the results of the attack with champagne. Late in the war there was a plan to send the two ships to attack convoys in the mid-Atlantic but difficulties associated with refuelling at sea caused the plan to be abandoned.
 |  |
The helm and binnacle of SMS Brummer
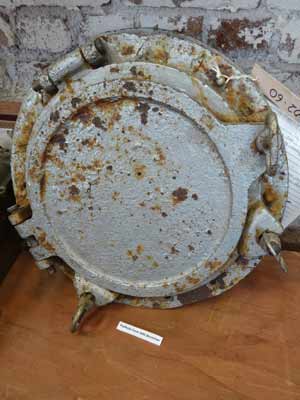
on display in the museum at Lyness | A porthole from SMS Brummer also in the museum |
Following the mutiny of the High Seas Fleet in Wilhelmshaven, Brummer was moved to Sassnitz. Along with the most modern units of the High Seas Fleet, Brummer and Bremse were included in the ships specified for internment by the victorious Allied powers. The ships steamed out of Germany on 21 November 1918 in single file, commanded by Rear Admiral Ludwig von Reuter. They were met at sea by a combined fleet of 370 British, American and French warships. The fleet arrived in the Firth of Forth (Edinburgh) later that day. Then, between 25 and 27 November 1918 they were escorted to Scapa Flow in the Orkney Islands, Scotland. Upon arrival, all wireless equipment was removed from the ships and the breech blocks of their heavy guns were removed to prevent their use. Crews were reduced to minimum levels.
The fleet remained in captivity during the negotiations that ultimately produced the Treaty of Versailles. Reuter believed that the British intended to seize the German ships on 21 June 1919 which was the deadline for Germany to have signed the peace treaty. Unaware that the deadline had been extended to 23 June 1919, Reuter ordered the ships to be sunk at the next opportunity. On the morning of 21 June 1919 the British fleet left Scapa Flow to conduct training manoeuvres, and at 11:20 am Reuter transmitted the order to scuttle their ships. Brummer sank at 1:05 pm.
Today the remains of SMS Brummer lie on the bottom of Scapa Flow at GPS 58° 53.83 W3° 09.15 using WGS84. This is about two kilometres north-east of the northern point of Cava Island. The depth here is 33 to 34 metres and the ship is laying on her starboard side with her bow facing roughly north.
Bow Dive
There is a shotline attached to the port railing area behind the bridge. It is about 23 metres to the port side of the hull. For your first dive here, drop over the deck at the shotline and head towards the bridge. The bridge is relatively intact, with the main parts built from brass, something I have never seen before on a ship. There is a railing around the top level of the bridge. Out from it on the sand is a mast and near the end the remains of two searchlights.
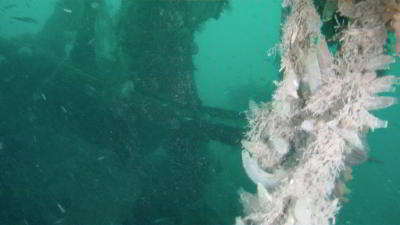 |  |
| Part of the remains of the bridge of SMS Brummer | The iris from the searchlight |
 |  |
| One of the 5.9 inch guns | The turret for the gun at
left, the barrel is bottom left of photo |
The searchlights are very interesting, they are relatively intact. The most interesting things you will see are the irises. These look like the irises that can be found inside an SLR camera lens (or your eye for that matter). There are also some pieces of thick glass from the lens as well as the bodies.
Head back to the main part of the wreck and in front of the bridge you will see the fire control tower. This is partially covered by the deck which has fallen out. You can swim through this part of the wreck. In front of the control tower is a 5.9 inch gun turret.
 |  |
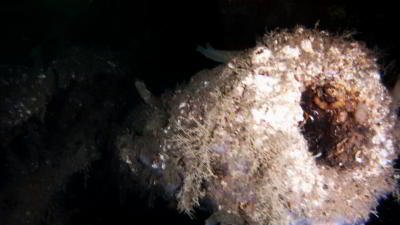
| The breach of the gun above | Kelly swimming forward inside the hull one deck down |
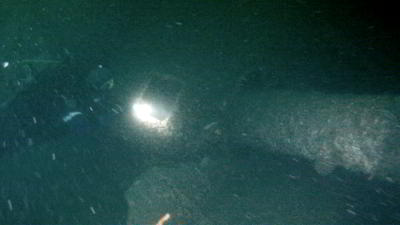 |  |
| Kelly and another turret and 5.9 inch gun | The end of the barrel of the gun at left |
The bow deck has peeled here and is hanging down from the port side. There are two anchor capstans visible. The starboard one has anchor chain running from it to the hawser and you can see the anchor still in place. The bow is quite broken up. Head back towards the stern, this time sticking close to the hull.
At the bridge you will see that you can enter the lower levels of the bridge. This will bring you out on the main deck behind the bridge. If you look closely at the deck main deck (though a number of holes), you will see that there is a railway track here. When you exit onto the false extended main deck behind the bridge, you can see through a number of holes the railway track. Eventually this exits the extended section behind the bridge and runs towards the stern. This was used for transporting mines to the stern area.
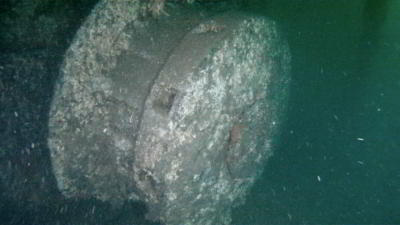 |  |
| One of the anchor capstans | The top of the starboard anchor in the hawser |
 |  |
| Kelly at the bow SMS Brummer | One of the window slits of the control tower |
From here head a bit further towards the stern and you will see another 5.9 inch gun. On one dive most people would only get to here before they will need to start ascending. Head back to the shotline and then up to the port hull. Shoot an SMB or ascend the shotline.
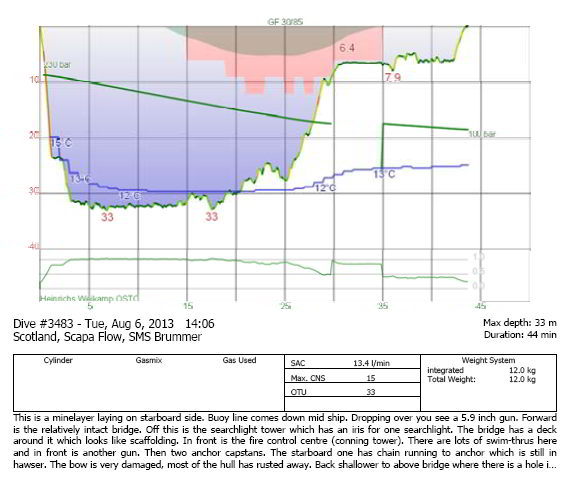 |
| A download from my computer showing our profile for the dive from midships to the bow and back of SMS Brummer |
We did just over 27 minutes and had one minute decompression at 12 metres, one at nine metres and five at six metres. This was using 24% Nitrox and 51% deco mix.
Stern Dive
For a second dive here, head down the shotline and start off towards the stern. You can again visit the 5.9 inch gun. Again you will see where the railway tracks exit the false deck. The hull is broken up back here, where extensive salvage work on the engine room was done in the 1960s and 1970s.
It is about 20 metres across the salvage break, just follow the left hand edge of the wreckage. As you go you should see one of two 88 mm guns under the wreckage. You will come to a mast which runs out onto the sand. Behind here is another 5.9 inch gun. This barrel is just visible. Further aft is another gun, this time the barrel is fully visible, pointing towards the stern.
The stern has a lot of damage. There is an anchor here. You can swim around to the rudder or instead, enter the hull. You do this by going up over the stern towards the bow and entering into the first level below the main deck. This is very open and you can swim all the way forward to the engine room salvage area. There are a number of places where you can look inside the hull and see parts of the steering and prop shaft.
 |  |
| A crab at left watches Kelly | The train tracks where they exit the false deck |
Once at the engine room, look around, there is a lot to see. There are parts of a broken up steam turbine. In front of this there is a hole into a coal bunker where there is still a wicker basket with coal in it. From here head back out onto the main deck and have another look at the 5.9 inch gun and the railway tracks.
You should still have time to explore the bridge and searchlights again before ascending back to the port hull and ascending the shot or shooting an SMB. For this dive we did just over 25 minutes (using 31% Nitrox) and only required two minutes decompression at six metres. We probably could have stayed a fair bit longer without problems as we ascended with 100 bar.
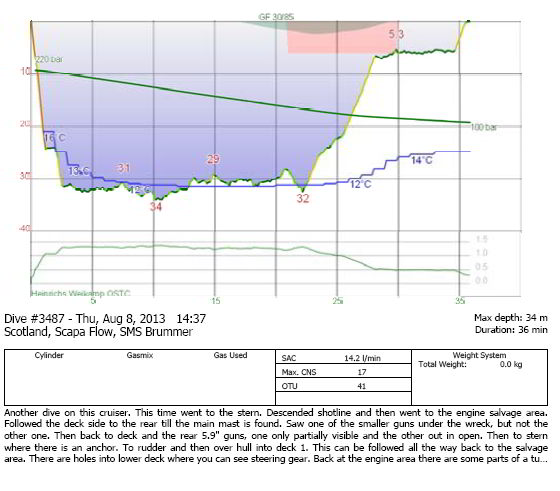 |
| A download from my computer showing our profile for the dive from midships to the stern and back of SMS Brummer |
This is a very good wreck, with lots to see. The water temperature in August was about 11.6° and the visibility varied from 5 metres on one dive to 10 metres on the other. There was no current to mention on either dive. Well worth doing twice if you can.
All underwater photos taken from video using a GoPro camera.
Kelly and I dived with MV Radiant Queen. The owners built a new boat since then which is called MV Huskyan. I would recommend them as we thought the operation was the best overall day charter boat we have used anywhere in the world and the new boat is heaps better than the old one.
Click here to see the list of wrecks
References:
| 
 v6.00.307 © 2003-2005