|
Catlypso - Michael & Kelly McFadyen's Sailing Adventures
This follows on from the page on cleaning and repairing Catlypso, click here to read.
LIGHTWAVE 38 LAYOUT
The boat is a 38 foot (11.3 metres) catamaran which is 6.6 metres wide. The following is the plan of the boat.
 |
| A typical layout for a Lightwave 38 - this is exactly how ours is configured |
 |  |
| Pieces of Eight (as she was called then) under power | The galley in Pieces of Eight |
NAME
As I mentioned in a previous page, we had decided right from the start that it was likely that we would want to rename the boat with a name that meant something to us, rather than to the person who originally purchased it. We considered a huge number of names, even asking our friends via Facebook to submit names. The suggestions and our own thoughts came up with a number of names that we considered over the years.
Some of the names that we considered were:
We decided that none of the names we thought of and were suggested to us were suitable. We had a brainstorming session and came up with a name that reflected our boat and our interests. A search of the internet showed that there was only one real reference to anything with this name, so it should be unique. However, because of boaties' superstitions, we could not use the name till we had the renaming ceremony.
The name we chose was Catlypso. This comes from the name of Jacques-Yves Cousteau's famous exploration ship, Calypso, combined with Cat from catamaran. We think that this reflects our interests (scuba diving) and our plan to explore the Pacific.
 |  |
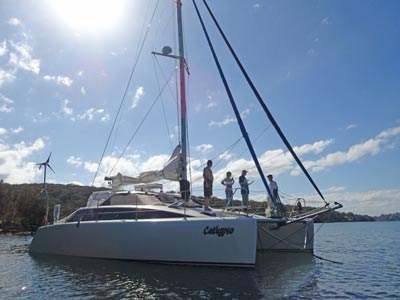
| Catlypso after we unveiled the new name | A close up of Catlypso showing the new name |
I had the boat's name, registration and port made on vinyl by a company just up the road. I can really recommend Plastic Printing as it was good quality at a brilliant price. If you live in the Sutherland Shire or nearby, Contact owner Brad Poole sales@plasticprinting.com.au.
I took the vinyl lettering out to the boat. To start, I removed the old registration number and label and cleaned this area with metholated spirits. I put the new ones on. I also put the home port name on the stern of the boat. Unfortunately this will be hidden by the tender most of the time, but the name was too big to fit on the transom.
I also removed the old name (Pieces of Eight) from the tender and the life buoys. I then spray painted the section of the life buoy with orange paint as it had faded and you could still read the whole name. I decided to respray the whole of each life buoy.
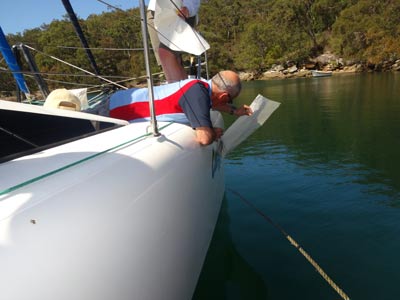
On 7 September 2014 Kelly and I decided where to put the new name on the bow. We used some adhesive tape to mark where we will put it. On 19 September I put the new name the bows ready for the renaming ceremony which is now set for 21 September 2014. I temporarily covered up the name (bad luck for anyone to see it) till the renaming ceremony.
Renaming Ceremony
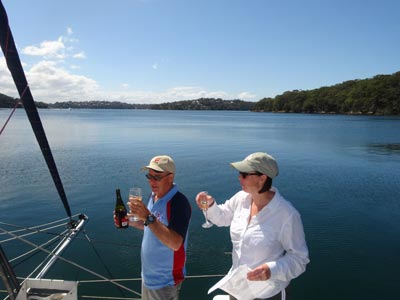
On 21 September 2014 we held a renaming ceremony where 19 friends joined us out on the yacht. Here we invoked the Greek God Poseidon to protect our yacht. This is supposed to ensure that there is no bad luck caused by the renaming of the boat. We spilt a lot of good sparkling wine in the process, as well as drinking quite a bit.
 |  |
| Kelly reading out the invocation to Poseidon | I sacrifice some sparkling wine to the north wind |
 |  |
| A toast to the new name, Catlypso | I remove the paper covering the name on the starboard bow |
MORE PURCHASES
Lifejackets
We also purchased another two inflatable lifejackets (making six inflatables on board) as well as two inflatable children's lifejackets. We also got a very small lifejacket for a young child. I also added Kelly's older inflatable lifejacket to the boat.
Laptop Based Charts
I also decided that we would run a laptop with charts for navigation planning. I mentioned about, we have a Raymarine chartplotter that is located at the helm. This is not really suitable for planning a trip. The laptop system would serve a number of purposes, not only planning but recording of the trip for later use on my web site etc. As well, I wanted to integrate the AIS system (see below) into it.
After looking at a lot of software options, I decided to use one called Memory-Map (see www.memory-map.com.au or www.memory-map.com. This is free, but you need to purchase the charts and also there are upgrades that also need to be purchased if you want those options. The charts for Eastern and Western Australia can be purchased separately, but when purchased together on-line cost US$129. This can be used on two computers.
The charts are the Australian Government ones digitised. There are thousands of them as far as I can see, including ones for some of the more popular, but small, Great Barrier Reef islands. I first used the system on our trip down from Queensland and it was brilliant. I later purchased the Professional Features upgrade for US$125. This integrates AIS as well as some other things.
I also downloaded another piece of software called OpenCPN. This is a free open source mapping software. However, this requires you to find charts. I decided to use this to access Google Earth satellite photos. To download the photos, you need Google Earth on your computer as well as another piece of software called GE2KAP which enables you to download Google Earth photos and save them.
Originally I set this up on my laptop but I later moved it all to our netbook computer. This was not a good decision as the screen is too small. In mid-November 2014 I set up one of Kelly's old laptops (which we replaced purely because the hard disk was too small) to run the charting software. This screen is much bigger and is working well. When we cruise, my laptop and the netbook will be back ups in case something goes wrong with the primary one.
AIS
As we have intentions to sail through very congested areas and also way out in the open sea, we decided that one of the safety features we wanted (as well as radar) was Automatic Identification System (AIS). For those who do not know, AIS is a system that uses VHF radio and GPS to transmit and receive signals relating to the location of ships and their speed and direction (and some more things).
The International Maritime Organisation's International Convention for the Safety of Life at Sea requires AIS to be fitted aboard international voyaging ships with gross tonnage of 300 or more and all passenger ships regardless of size.
I looked around for a long time before we purchased the yacht deciding what make I would buy. Even though we had almost 100% Raymarine instruments, I decided that the Raymarine AIS system was too expensive. In the end, after looking at many brands, I decided that the AIS120 series made by GME did everything that we wanted, was able to be integrated into our existing chartplotter and laptop based software. It was also the cheapest.
When the Sydney International Boat Show was on in early August 2014, the major marine retailer in Sydney, Whitworth's, had a sale with 15% off. We purchased the T120 (the AIS Class B Transceiver) and the S120 (AIS Antenna Splitter). You need the splitter to connect the VHF radio and aerial to the transceiver.
The cost of the T120 normal price was $549 and the S120 $219. With the 15% discount ($115), the price was $652, less than the best cost I could find for a brand name transceiver.
 |  |
| The AIS module - note the VHF mobile at left and the wireless router above | The AIS aerial splitter |
I was going to start the installation of this in late August or early September when we returned from a diving trip to Bali. However, on 7 August 2014 I went out to the boat and installed it in less than two hours. It was pretty simple. I purchased a couple of inline fuse cables from Jaycar and attached these to the ends of the power cables.
To make things even easier, I did not even have to attach them to the accessories power switch as I noticed a wire that came to an end with a crimp connector on it. I located an earth wire and cut into it and soldered the earths to it. It was then a matter of putting all the cables in place, plugging the VHF aerial into the splitter, then putting the provided aerial cable between the splitter and the VHF radio.
I put the splitter behind the lounge (where all the electrical stuff is located) and the transceiver is located above the map/comms station on the port side. The cables go through existing holes and I pushed the USB plug through another hole that leads to the map table and where I keep the laptop computer.
Originally I did not permanently mount the AIS module as I wanted Kelly to okay the location I proposed. I put it in this location as it can pick up the GPS satellites from there and means I do not need to get another GPS aerial or link it into an existing one. I also used an existing screw hole for one mounting screw and it covered another one. It is now secured in place.
 |
A screen dump of Memory-Map showing the ships in port using AIS. The green ships are moving, the grey ones stationary.
The green line shows the direction the ship is heading and how far it will go in 10 minutes.
Note that some ships show their shape and size. I am not sure why the others do not. |
I integrated it into Memory-Map and tested it. After a couple of problems picking the right COM port to use, I got it working. Also, when I had the MMAIS application open (this is the Memory-Map AIS specific software), it conflicted with the ProAIS2 software that came with the AIS (I think most AIS units use the same software). You can only have one of these open at any time.
Once I got it working, it was picking up ships from Botany Bay, Sydney Harbour and Port Kembla without a problem. In fact, I was listening to the port control talking to incoming and outgoing ships and then checking where they actually were via Memory-Map. Of course, I do not yet have an MMSI number (I need to do the radio operators exam) so I cannot yet test the transmission. I will get around to this in late November or early December 2014.
I have also integrated it into OpenCPN. On 21 October 2014 I connected it via NMEA0183 to the Raymarine A70 chartplotter. This took a bit of work, as I needed to run a cable from the helm under the floor to the underside of the lounge in the saloon.
To do this I purchased a long bit of plastic from Bunnings (sold as an electricians gizmo) and pushed it through from the helm and then attached a wire to a hole I drilled in the other end. I pulled it though to a spot under the navigation table. I then needed to push it though from the other end and then attach the wire again and pull it back. It was then a simple matter of soldering the correct wires together.
However, even after doing this I could not get the AIS to show on the chartplotter. I could see that the system was recognising that AIS was connected, but nothing was visible. I then realised I had the wrong NMEA speed selected in the system integration menu item. Once this was fixed, I could then see the data coming in (via a debugging option not mentioned in the manual), but still nothing to see. I then checked the layers option. Here I found that there was a setting to make AIS visible. Once I selected this, bingo, I had ships visible in Botany Bay!
However, we still are not transmitting as to get the necessary MMSI number to program into the AIS transponder you need to have a radio licence. This is ridiculous as it makes this safety feature unavailable unless you spend another $75 to $150 to do a radio licence course and examination. Anyway, on 4 December 2014 I did the exam and on 16 December 2014 I was advised I had passed. As soon as I get the certificate I can apply for an MMSI number.
Generator
Since our plan is to spend a lot of time in remote areas and have no plans to use marinas except when there is no option, we decided that we will need some auxiliary power to supplement the solar and the wind generator. I also would like to have some power so that we can use the hot water heater without necessarily running the engines and also for when we might need to use heavy drawing electrical equipment.
After looking around and reading a 4WD magazine that compared a range of small generators and finding a sale on a Lectron EC2000i 2000 watt invertor generator. The price I found was $419 delivered. I saw the same generator for sale elsewhere for $600 to $800.
On 24 September 2014 I received it and tested it out. It is not as quiet as a Honda (but then it is less than a quarter of the price) but it is pretty good. I tried it with a hair dryer connected and it worked well. I tested it out over the October long weekend when I ran it for about 15 minutes and used to power the 240 volt hot water system. We also used it at our dive club Christmas party where it powered a coffee machine. All this running used about two litres of fuel. My guess was that it had run for about three hours all up.
Other things
I also purchased a plastic cup holder which I attached next to the helm. This will come in handy as there was no place to store a bottle of water when you were on watch.
For information on repairs after 1 December 2014, go to this page.
Return to main sailing page.
| 
 v6.00.307 © 2003-2005